Introduction
Until now, you've learned how to use CSS, Tachyons, and Markdown in order to customize your blocks on Store Framework. However, it's also important to learn how to create custom templates, so your store can have custom landing pages, for example, with a well-defined URL and specific content to display.
Stores are made up of several different pages, each with a specific content and layout. When creating a store from scratch in VTEX IO, some default pages with preset URLs are already available. Below, we have a list of some of these default pages:
store.home(Home page)store.product(Product page)store.search(Search Results page)store.account(Client Account page)store.login(Login page)store.orderplaced(Order Placed page)
In this step, you'll learn how to create a custom template from scratch.
Creating a Landing Page
Just a few steps are needed to create a custom landing page:
- Create a new template in your store's theme
- Create a new path to access this template
Template
A template defines the page layout. However, if you want to create a custom page, you will also need to create a new template in your theme.
Let's imagine that you want to create a simple page containing information about your store. Inside the blocks folder, you can create a file that would contain the following code, declaring a new template for a custom page,
_10{_10 "store.custom#{templatename}": {_10 "blocks": []_10 }_10}
where {templateName} must be replaced with the template's identifying name.
Then, you should fill in the code with the components needed to create the layout, this will be better shown in the activity.
Path
Now that a new template with the page layout has been defined in the store theme's code, the next step is to establish the page's page that would lead to this layout.
We must create a routes.json file in your theme's store folder. Afterwards, insert the code below,
_10{_10 "store.custom#about-us": {_10 "path": "/{URL}"_10 }_10}
where {URL} is the name of the desired path.
Creating a custom template
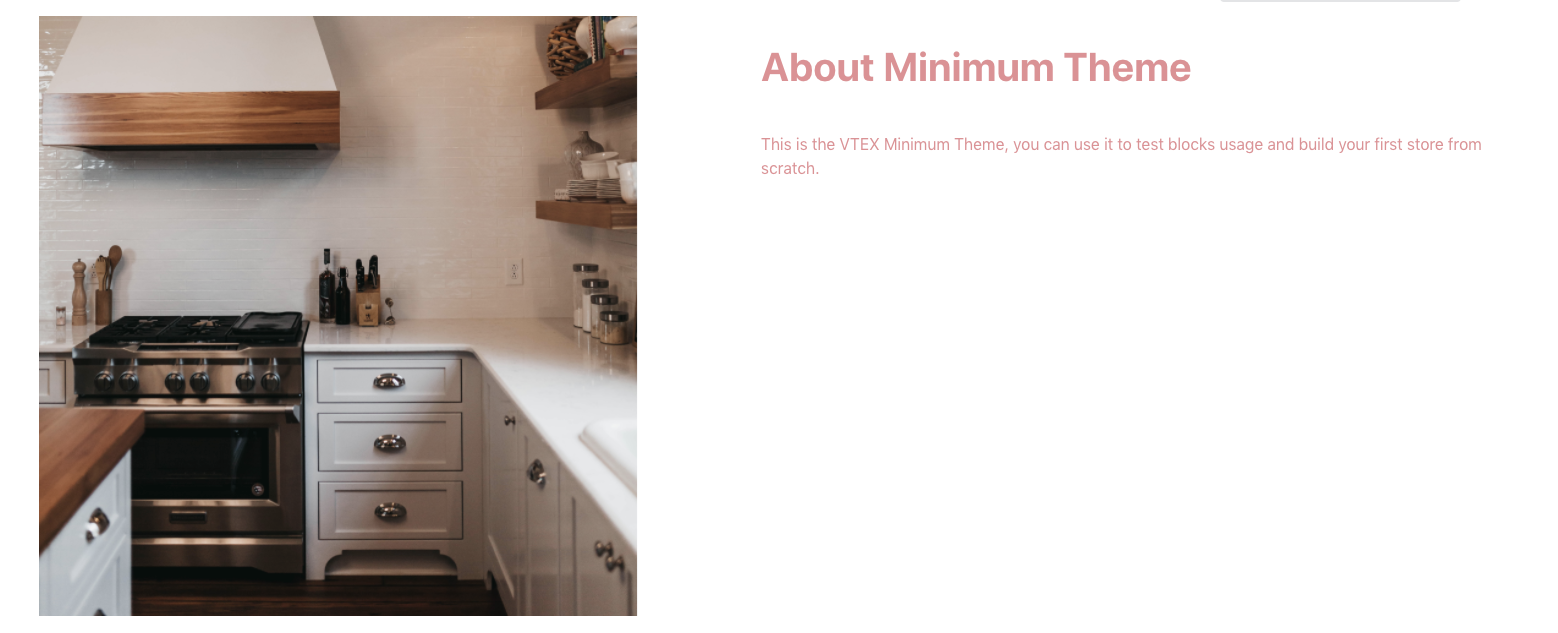
Let's create a page containing information about your store, as in the example below:
-
In the
blocksfolder, create a file calledabout-us.jsonc; -
Declare a
store.custom#about-ustemplate in this file; -
Include a "flex-layout.row#about-us" block in this template:
_10{_10"store.custom#about-us": {_10"blocks": ["flex-layout.row#about-us"]_10}_10} -
In the same file, add the code block below, right afer the declaration of
store.custom#about-us. It's responsible for definingflex-layout.row#about-us._10"flex-layout.row#about-us": {_10"children": [_10"image#about-us",_10"flex-layout.col#text-about-us"_10]_10}, -
Now, let's define its children blocks in order to create the complete layout:
_26"flex-layout.col#text-about-us": {_26"children": [_26"rich-text#about-title",_26"rich-text#about-content"_26],_26"props": {_26"preventVerticalStretch": true_26}_26},_26"rich-text#about-title": {_26"props": {_26"text": "# About Minimum Theme"_26}_26},_26"rich-text#about-content": {_26"props": {_26"text":_26" This is the VTEX Minimum Theme, you can use it to test blocks usage and build your first store from scratch."_26}_26},_26"image#about-us": {_26"props": {_26"src": "https://appliancetheme.vteximg.com.br/arquivos/cozinha-about-us.png",_26"maxHeight": "600px"_26}_26} -
In the
storefolder, create a file calledroutes.json; -
In this file, declare an
/about-uspath:_10{_10"store.custom#about-us": {_10"path": "/about-us"_10}_10} -
Once the code is linked, access
{workspace}--appliancetheme.myvtex.com/about-usto see your new landing page.